
How to bulk edit product descriptions in Shopify safely
You can bulk edit product descriptions in Shopify three ways: the built-in bulk editor, a CSV export-and-import round trip, or a description app. All three work. None of them will save you from yourself, because Shopify keeps no version history of product content: once a description is overwritten, the old one is gone unless you kept a copy.
So this guide covers both halves of the job. The mechanics of each route, and the safety net that makes a 1,000-product edit boring instead of terrifying. The net costs nothing and takes 30 seconds; the stories where someone skipped it are why this article exists.
Three ways to bulk edit product descriptions in Shopify
Each route fits a different job, and each has one risk worth knowing before you start:
| Route | Best for | The risk |
|---|---|---|
| Built-in bulk editor | small manual fixes across a handful of products | typing into live fields with no undo |
| CSV export and import | catalog-scale edits in a spreadsheet | a blank column silently erases live data |
| Description app | generating new copy at scale | publishing unread AI text |
Route 1: the built-in bulk editor
Shopify’s bulk editor opens a spreadsheet view of the products you select: tick the checkboxes on the Products page, click Bulk edit, then add the fields you want as columns, including Description. For fixing a recurring typo across 15 products or appending a shipping note, it’s the fastest route there is.
Know where it stops. It’s an editor, not a generator: every description is you, typing or pasting into a live field. There’s no before-and-after view, and no undo; the moment you save, the previous text is gone. Shopify’s docs also warn that the more you change at once, the longer the save takes, which is not what you want to read mid-edit on 90 products.
My opinion: the bulk editor is good for prices, tags, and flags, and wrong for descriptions, and I’d hold that even if I didn’t build the alternative. Descriptions are paragraphs with HTML in them, and a spreadsheet cell is a bad place to edit either: it’s easy to break formatting you can’t see until it’s live. Paragraph-length content in a live field, with no history, is an accident waiting for a busy afternoon.
Route 2: the CSV round trip
The CSV route is the workhorse: Products, Export, edit in any spreadsheet tool, then Import with overwrite enabled. The product CSV carries a Description column, plus SEO title, SEO description, and Image alt text, so one file can update the same four fields a description app writes.
It also carries the sharpest edge in this whole article. On import, a blank cell doesn’t mean “leave that field alone”: for non-required columns, Shopify’s docs say “the matching value in the product list is overwritten as blank”. Import a file where the description column is half-filled and the empty half deletes those descriptions on the live store. (A file can erase your descriptions by not mentioning them. I find that genuinely unsettling.)
Three rules make the route safe:
- Delete every column you don’t intend to change before importing, except Handle and Title. What isn’t in the file can’t be overwritten.
- Never touch the option columns (Option1, Option2, Option3) in a description edit. Changing them regenerates variant IDs, which breaks anything wired to the old ones.
- Import 5 products first. Cut a five-row copy of the file, import it, check the live pages, then run the rest.
Kept clean, the CSV round trip is also your free undo for every other route: the export you make before any bulk edit is a complete snapshot of every description, meta field, and alt text in your store. Date the filename and keep the last few; a folder of weekly exports is the closest thing to version history Shopify will give you for free.
There are also dedicated bulk-edit apps that wrap this CSV workflow in a friendlier spreadsheet interface. They change the ergonomics, not the physics: the same questions about previews and undo apply to them as to everything else here.
Route 3: description apps
Apps are the only route that writes the text for you, which is why they’re also the route where the safety question matters most. The definition I keep repeating on this blog: a safe bulk editor is one where nothing is published until you approve it, and nothing you publish is more than one click from restored. An app that generates 500 descriptions and writes them straight to your live store fails that test no matter how good the writing is.
This workflow is what InkForge, an AI product description app for Shopify with preview and rollback, is built around. A bulk run comes back as a queue, not a fait accompli: every product shows its generated description, meta title, meta description, and alt text next to what’s currently live, and you approve, edit, or reject per row. Version history keeps every published change one click from restored, so a wrong brand voice on Tuesday is a regenerate, not a restore-from-backup. Bulk generation with per-row approval is on the $15 Starter plan (500 products a month); the free plan covers 50 products a month, one at a time.
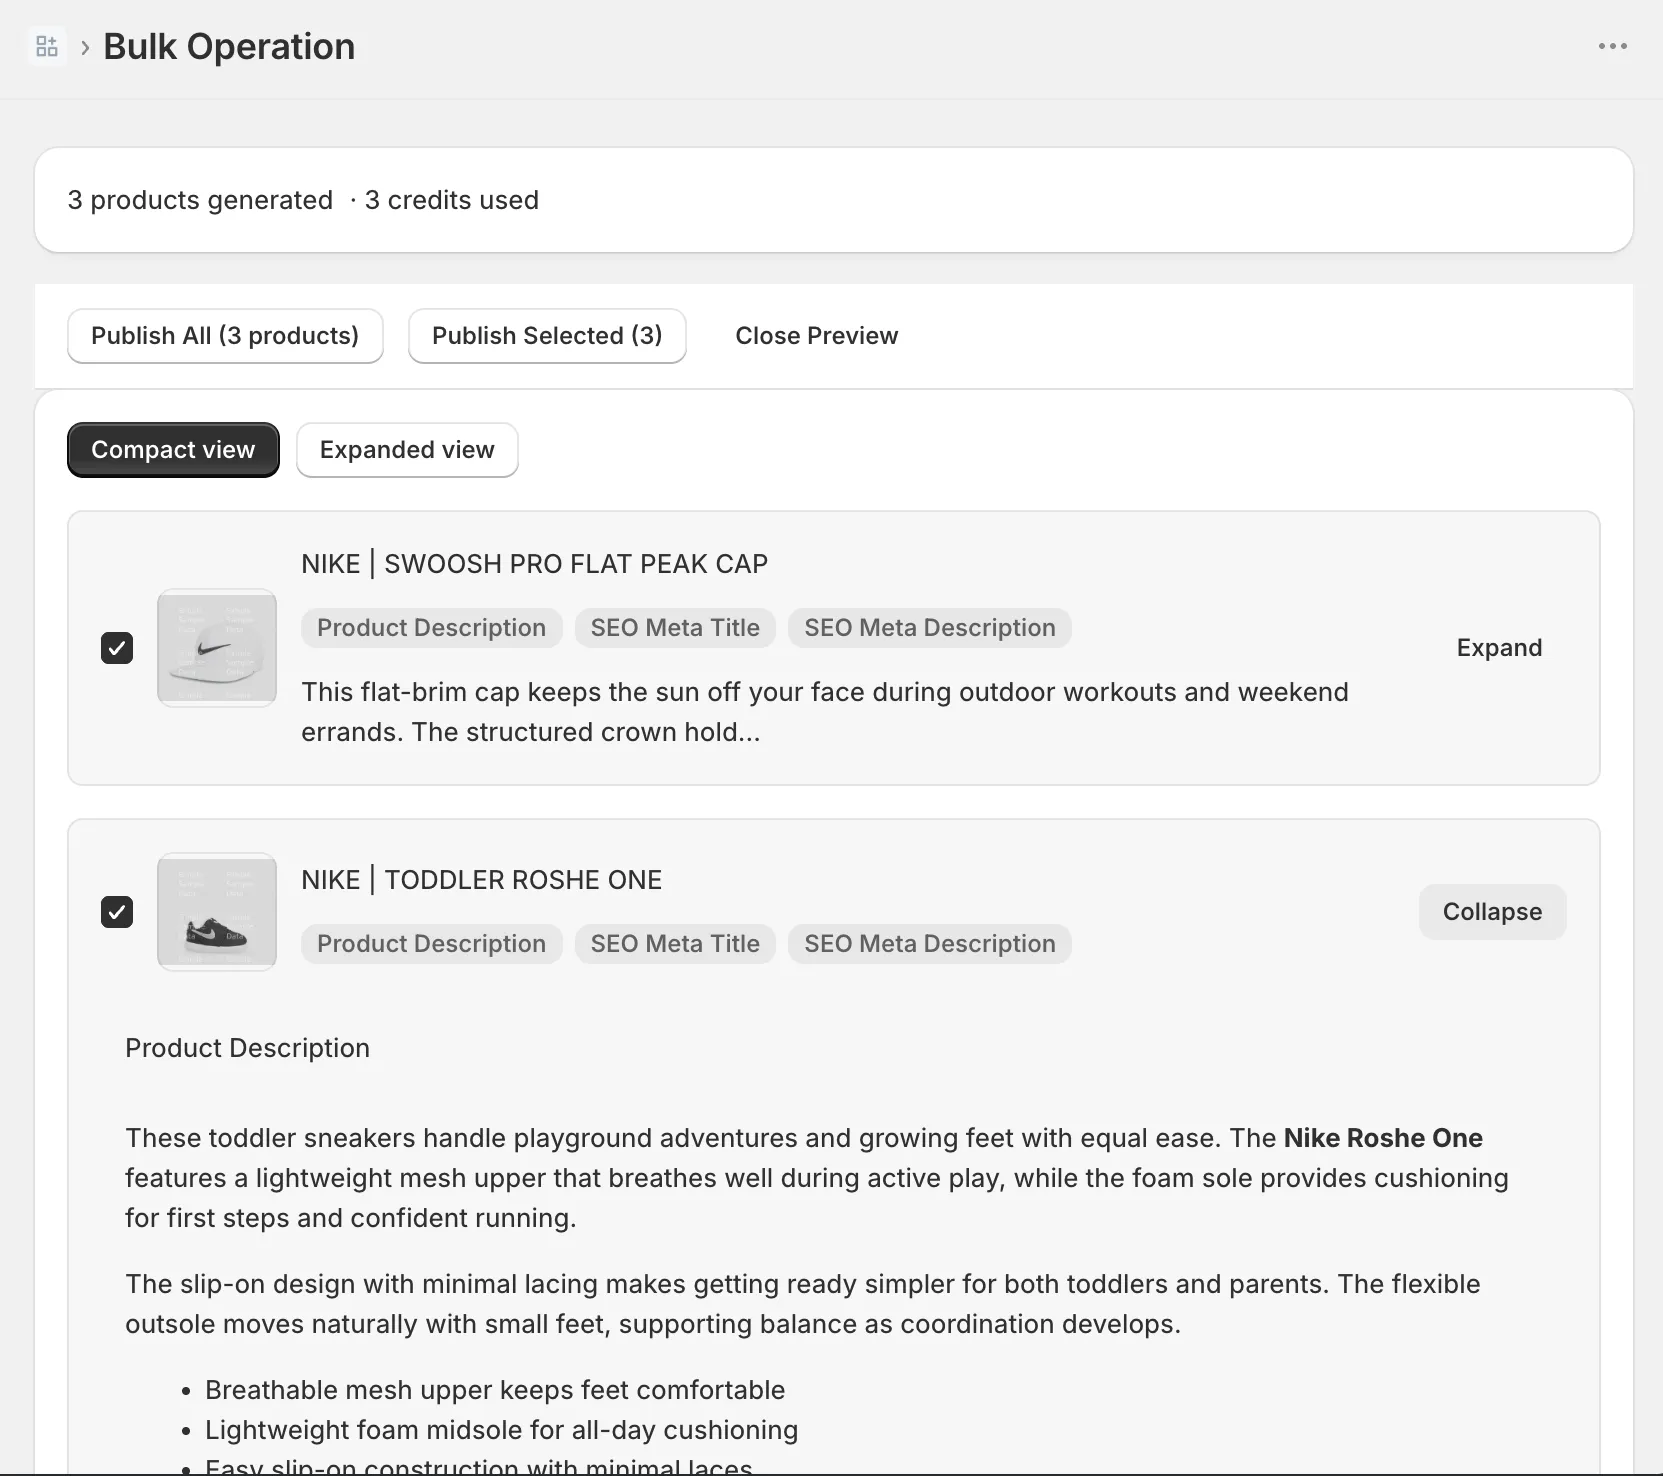
Whichever app you pick (there are four worth comparing), interrogate the listing for three things before a big run: a preview before publish, approval per product, and a rollback path. If the listing doesn’t mention them, ask support in writing and keep the answer.
The safe bulk edit checklist
The whole discipline fits in six lines. It’s the same net I use in the catalog cleanup workflow, and it works with every route above:
- Export products to CSV first, always. 30 seconds, and it’s a full snapshot of what you’re about to change.
- Test on 5 products before 500. Small batch, live check, then scale.
- See every change before it publishes. A diff or preview, not a progress bar.
- Confirm the rollback path. Actually restore one old version before you need to restore hundreds.
- Keep failed rows out of the batch. If 12 products error or read wrong, fix and re-run those 12; don’t force the batch through.
- Spot-check live pages after. Five minutes on your bestsellers catches formatting surprises while they’re cheap.
And if a batch already went wrong without a net: your last export is the restore. Re-import it with only Handle, Title, and the columns you need back, and the old content returns the same way the new content arrived. If there’s no export, there’s no built-in way back, which is why rule 1 is rule 1.
Skip one and you’re gambling; run all six and a bulk edit is just an edit. If you’d rather the preview and the rollback come built in, the free plan covers your first 50 products, which is exactly a test batch and a half.
FAQ: bulk editing product descriptions in Shopify
Can you bulk edit product descriptions in Shopify without an app? Yes, two ways. The built-in bulk editor can show a Description column: select products, click Bulk edit, and add the column under Columns. Or export the product CSV, edit the Description column in a spreadsheet, and re-import. Neither route generates text or keeps a version history.
Does Shopify have an undo for bulk edits? No. Shopify keeps no version history of product content, and the bulk editor’s documentation lists no undo. Your undo is the CSV you export before editing, or a description app that keeps version history and rollback.
What’s the safest way to bulk edit 1,000 descriptions? Export everything to CSV first, run 5 products before 500, use a tool that shows each change before it publishes, confirm the rollback path actually restores an old version, and keep failed rows out of the batch instead of forcing them through. Then spot-check live pages.